Sur ce blog j'accueil touts mes contactes Multiply, les filles de chez Eva, Crochetfans, Joh, et la Casita et toutes les autres. Pour partager des idées, des projets, des modèles et plus. Bienvenue a toutes Evlyn (frimouse sur Multiply)
Affichage des articles dont le libellé est Papier et cie. Afficher tous les articles
Affichage des articles dont le libellé est Papier et cie. Afficher tous les articles
samedi 22 avril 2017
samedi 21 janvier 2017
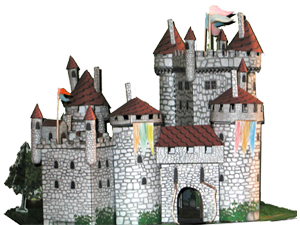
Maquette de château fort en papier
Maquette de château fort en papier
Merci a Jonathan.
http://jumpifnotzero.free.fr/?/construire/chateau/
Téléchargement des documents
 Les documents sont générés avec Omnigraffle 3, qui a plein de bugs d'alignements et d'autres encore. Mais vu la précision des ciseaux de marmots, c'est pas bien grave :) Important : imprimez les documents sans mise à l'échelle. Les documents PDF ne sont pas vraiment optimisés, ils font plusieurs MO chacun. En même temps c'est tout en granit :-p
- Tour carrée 6x6x9
- Tour ronde 5x11
- Tour ronde 4x12
- Logis 1 8x4x7
- Porte - Pont-Levis
- muraille largeur 7 hauteur 5
- Demeure seigneurale
- Donjon (et piège à éviter sur le donjon)
Remarques :
- Le découpage du château peut-être laborieux avec des ciseaux (créneaux, balcon de la demeure,…). Si cutter il y a, il doit être utilisé par un adulte (ou au moins un grand enfant)
- la première page du document "donjon" contient les tours rondes : ne plier ni les grandes bandes de collage ni les pointillés, il servent à l'alignement des murs du donjon ! (si vous avez d'autres remarques écrivez moi)
- Le modèle ci-dessus tient sur une page A4… libre à vous d'en faire un sur une page A5… ou A1 !
- L'échelle est environ1/100 (1cm ≈ 1m) mais c'est assez imprécis, ce n'est pas le but.
- Les documents vous permettent de créer des batiments entiers, qu'il vous faut ensuite découper (proprement) pour assembler.
- Vous noterez que certains détails sont volontairement non finis. Par exemple les cheminées ne sont pas bizeautées, vous pouvez comme ça les couper à la longueur que vous souhaitez. De même, n'hésitez pas à modifier des éléments (faire des toits bien pointus,…) et m'envoyer les modifs…

samedi 9 janvier 2016
vendredi 3 juillet 2015
Carte de Mariage
Carte de Mariage avec schémas facile à réalisée et très jolie :))
Merci à tilly pour ce modèle
http://www.elowezil.blogspot.co.nz/2013/04/easy-wedding-card-with-template.html


http://www.elowezil.blogspot.co.nz/2013/04/easy-wedding-card-with-template.html
lundi 23 mars 2015
mercredi 4 février 2015

mercredi 10 décembre 2014
samedi 13 septembre 2014
mardi 13 mai 2014

lundi 3 mars 2014
Lapin de pâques
Chez Childmade http://childmadetutorials.blogspot.ro/2011/02/paper-roll-easter-bunny.html
Paper Roll Easter Bunny
My imagination is like a bad habit. I have no apparent control over it. I'm trying to focus on work and school, but my mind keeps dwelling on toilet paper rolls. Ever since I did my Paper Roll Shamrocks, I'm completely obsessed. I guess maybe it's really more of an OCD.
Whatever. Anyway, yesterday's imagination binge resulted in this:
 Isn't he cute?!!! Completely unrelated to ANYTHING else going on in my life right now, except for toilet paper rolls, of course. Completely unrelated to anything I NEED to be doing, really. But still ... isn't he cute? You want to do one too now, don't you? Easter isn't for 2 months, but you still want to do one now, don't you? And you'll want to even more when you see just how easy it is!
So, follow along and I'll show you how!
The supplies you will need are: 1 paper roll, a 1/2" pink pom, two 5mm black poms, a 1" white pom, and a short length of ribbon or yarn.
 Begin by lightly flattening the paper roll and cutting it into 1/2" strips.
 Form a strip into a heart shape by inverting the fold on one side.
 Pinch the fold firmly to encourage the new direction.
 If you have a particularly stubborn roll like mine, you can help shape the heart by rolling the tube onto a pencil. Only do this at the section that will form the top of the heart.
 Next, form another strip into the shape of an oval.
 Glue the heart-shaped strip upside-down onto the top of the oval-shaped strip. This will form the head and body.
 Glue two more strips to the top of the head (the bottom of the heart) to form ears. The ears can be arranged in various positions.
 Glue two more strips to the bottom for the feet.
You can use the strips for the feet as they form naturally, or you can shape the feet a bit more by adding a fold about 1/2" away from one of the other folds, and then flattening the shortened side for the bottom of the foot. (See finished project for examples.)
 Take another strip and invert the fold on one side, pushing the fold through to the opposite side of the roll.
 Glue the fold to the opposite side.
 Glue the shaped strip into the body cavity to form the front paws.
 Repeat the shape with another strip and place it into the face for the cheeks.
 Your bunny should be looking like this.
 If you'd prefer a white bunny, this is a good point to stop and spray-paint it.
Spray paint will have a tendency to absorb into the cardboard and will require a number of coats for good coverage. One trick to reduce the number of coats you'll need is to spray-paint first with a base coat of silver. The silver paint works as a primer and seals the cardboard, reducing the amount of paint lost to absorbtion.
 Next, the bunny needs a face. Pom-poms work really well and add a soft texture to the finished project. Glue two 5mm black poms onto the top of a 1/2" pink pom. I used two black poms that were slightly varied in size, to give the bunny a more comical face.
If you're doing this with younger children, this will probably be a difficult step for them. You can glue the poms together in advance to make the project easier for them.
 Glue the pink pom to the face. Tie a ribbon or a piece of yarn around the bunny's neck.
 Glue a 1" white pom to the back for a tail.
 He's all done! Wasn't that easy?? Now what to do with him?
 He's adorable just as he is...
 ...but he is an Easter Bunny, afterall, so maybe a couple of Easter eggs.

 Or he could be holding a tiny basket, or a giant candy bar.
 Wouldn't that face be adorable delivering a special message?
What do you plan to do with yours? You know you're gonna make one! Let me know and I'll post a link!
Check out this one at Bonequinhos De Pano! Well done!

And be sure to check out the endless list of inspirational ideas at my home page childmade.com.

Whatever. Anyway, yesterday's imagination binge resulted in this:
 Isn't he cute?!!! Completely unrelated to ANYTHING else going on in my life right now, except for toilet paper rolls, of course. Completely unrelated to anything I NEED to be doing, really. But still ... isn't he cute? You want to do one too now, don't you? Easter isn't for 2 months, but you still want to do one now, don't you? And you'll want to even more when you see just how easy it is!
So, follow along and I'll show you how!
The supplies you will need are: 1 paper roll, a 1/2" pink pom, two 5mm black poms, a 1" white pom, and a short length of ribbon or yarn.
 Begin by lightly flattening the paper roll and cutting it into 1/2" strips.
 Form a strip into a heart shape by inverting the fold on one side.
 Pinch the fold firmly to encourage the new direction.
 If you have a particularly stubborn roll like mine, you can help shape the heart by rolling the tube onto a pencil. Only do this at the section that will form the top of the heart.
 Next, form another strip into the shape of an oval.
 Glue the heart-shaped strip upside-down onto the top of the oval-shaped strip. This will form the head and body.
 Glue two more strips to the top of the head (the bottom of the heart) to form ears. The ears can be arranged in various positions.
 Glue two more strips to the bottom for the feet.
You can use the strips for the feet as they form naturally, or you can shape the feet a bit more by adding a fold about 1/2" away from one of the other folds, and then flattening the shortened side for the bottom of the foot. (See finished project for examples.)
 Take another strip and invert the fold on one side, pushing the fold through to the opposite side of the roll.
 Glue the fold to the opposite side.
 Glue the shaped strip into the body cavity to form the front paws.
 Repeat the shape with another strip and place it into the face for the cheeks.
 Your bunny should be looking like this.
 If you'd prefer a white bunny, this is a good point to stop and spray-paint it.
Spray paint will have a tendency to absorb into the cardboard and will require a number of coats for good coverage. One trick to reduce the number of coats you'll need is to spray-paint first with a base coat of silver. The silver paint works as a primer and seals the cardboard, reducing the amount of paint lost to absorbtion.
 Next, the bunny needs a face. Pom-poms work really well and add a soft texture to the finished project. Glue two 5mm black poms onto the top of a 1/2" pink pom. I used two black poms that were slightly varied in size, to give the bunny a more comical face.
If you're doing this with younger children, this will probably be a difficult step for them. You can glue the poms together in advance to make the project easier for them.
 Glue the pink pom to the face. Tie a ribbon or a piece of yarn around the bunny's neck.
 Glue a 1" white pom to the back for a tail.
 He's all done! Wasn't that easy?? Now what to do with him?
 He's adorable just as he is...
 ...but he is an Easter Bunny, afterall, so maybe a couple of Easter eggs.
 Or he could be holding a tiny basket, or a giant candy bar.
 Wouldn't that face be adorable delivering a special message?
What do you plan to do with yours? You know you're gonna make one! Let me know and I'll post a link!
Check out this one at Bonequinhos De Pano! Well done!
mercredi 19 février 2014


samedi 15 février 2014
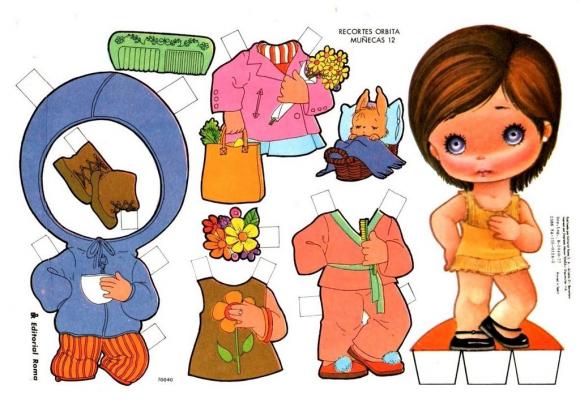
Paper toys, maisons de poupées etc ...
 une quantité de modèles à imprimer, plier, sur ce site à explorer de long en large, maison de poupées, meubles, voitures
http://papermau.blogspot.fr/2011/11/vintage-house-paper-model-with.html
dimanche 20 octobre 2013
Boite cadeaux
Vous voulez faire un petit cadeaux?
Mais l'emballer dans quoi? la question
ici vous trouverez de belle boite cadeaux a offrir ou tout simplement pour se faire plaisir

En voici une que j'ai sélectionner, mais il y en a bien d'autre ici
Evlyn
dimanche 13 octobre 2013


Inscription à :
Articles (Atom)